How to Clone Your Steam Deck’s SSD for an Easier Upgrade
Are you upgrading your Steam Deck SSD however do not want to installation your device from scratch? Here’s the way to clone your SSD for an easier upgrade.
Table of Contents
Why Cloning Your Steam Deck’s SSD Is higher
Slotting in a new SSD into your Steam Deck doesn’t automatically load it with SteamOS, your login statistics, or your video games. If you want to simply plug in your new SSD into your Steam Deck with out setting up the device from scratch, cloning is the best manner to go.
Cloning your old SSD will trick your Steam Deck into wondering it’s the identical one, besides with extra garage. All of your documents, Steam Deck settings, login statistics, games, and many others., will all be recognized the equal way by means of your Steam Deck.
If you’re looking to install a bigger SSD in your Steam Deck, clone your old one to it first so you can straight away start downloading new video games to it instead of sitting fussing approximately installing SteamOS.
A way to Clone Your Steam Deck’s SSD to a brand new One
Cloning your antique SSD to your new one will prevent so much time. You received’t need to experience the time-consuming technique of manually imaging SteamOS, logging in, watching for updates, and getting all your antique settings right. Right here’s how you can do it…
Step 1: download Macrium replicate on a Separate pc
Given that we’re now not going to be the usage of an SSD enclosure on this guide, we’re going to want a separate computer that has an NVMe/SATA M.2 slot at the motherboard.
On the laptop, we’re going to use Macrium reflect to clone the old SSD onto the brand new one.
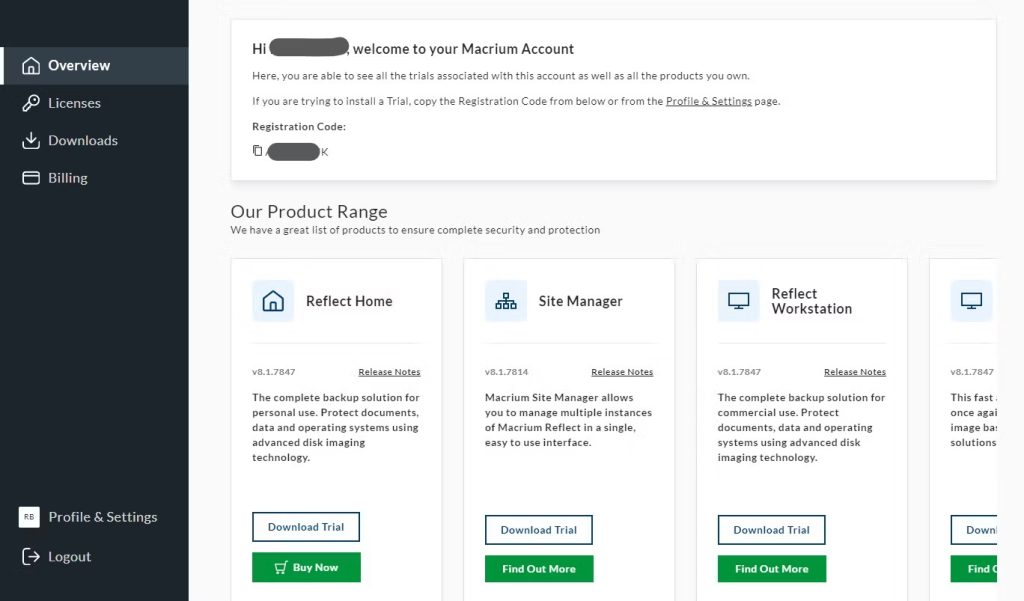
Sign up and create a Macrium reflect account and download the free trial as it has the whole thing you want for this technique.
In the course of the setup, take a look at the container for the 30-day trial and enter your license plate while it asks for it.
As soon as the setup is executed, and you’ve hooked up Macrium replicate to your pc, you can now head to the next step.
Step 2: photograph Your vintage SSD
In case you most effective have one SSD slot to your motherboard, then imaging your SSD is the most effective manner to move.
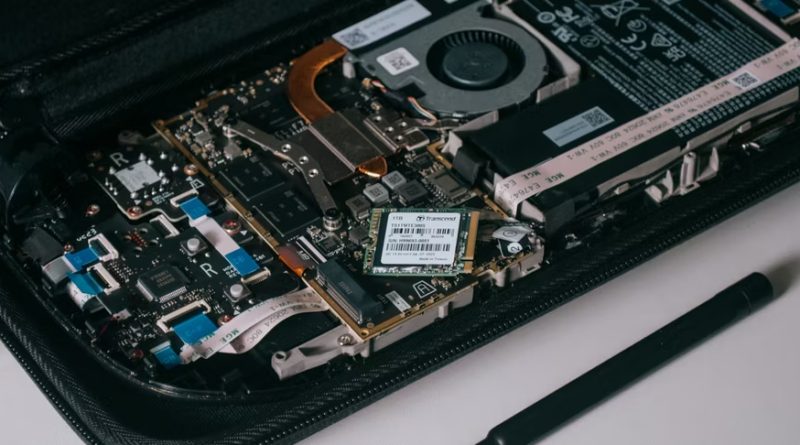
First, put off your Steam Deck’s old SSD. If you don’t realize how, take a look at out this Steam Deck SSD installation guide as you’ll be the use of it later to put in your upgraded SSD as properly.
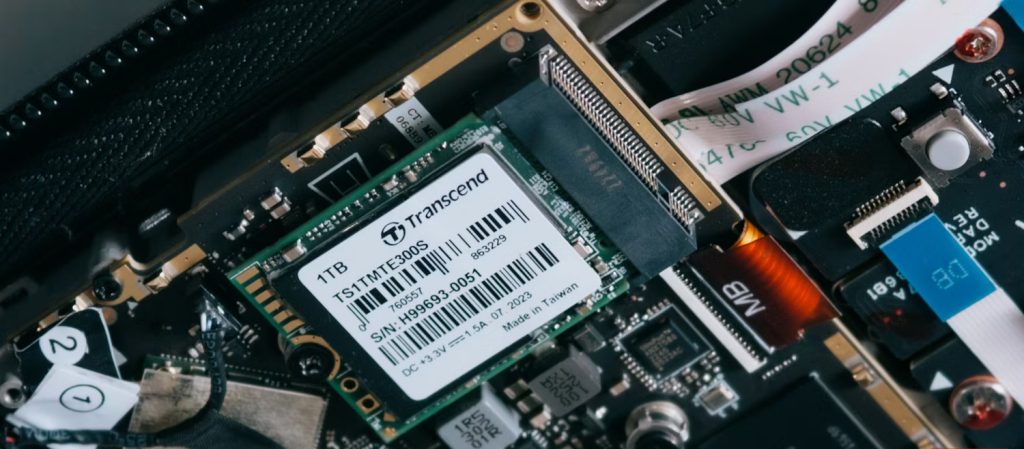
Next, with your computer shut down and unplugged, you need to deploy the NVME or M.2 SSD into your motherboard. For the reason that Steam Deck uses a 2230-length SSD, you most probably received be capable of screw it down. However that’s ok so long as you don’t knock it off or move your computer an excessive amount of all through the method.
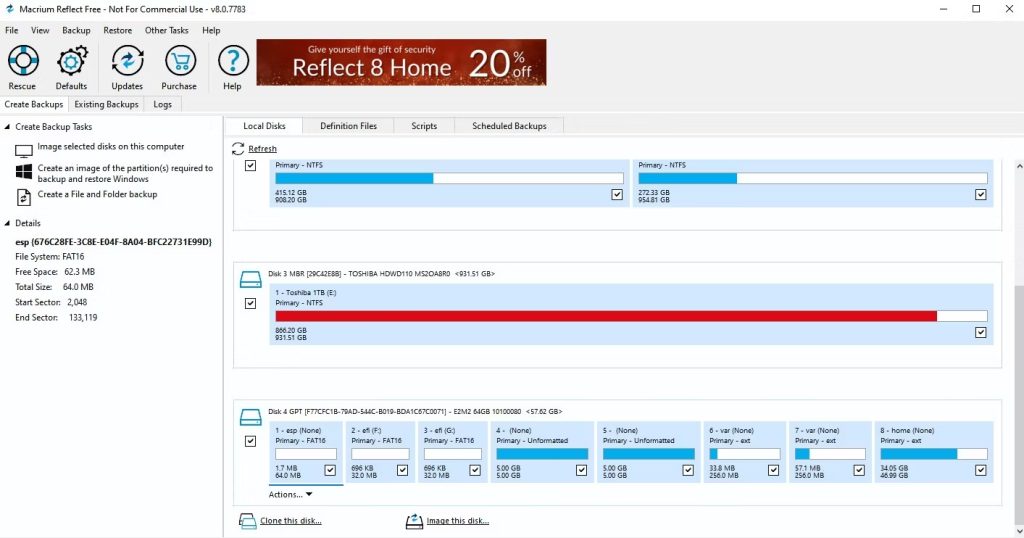
Now, activate your laptop and open up Macrium mirror. Select your antique Steam Deck SSD within the drives listing and click on on image this disk… beneath it.
It’ll ask you wherein you want to store your image record. I selected to make a new folder so that i’d bear in mind in which to get it from later. Macrium reflect compresses photos all the way down to forty% in their unique size, so make sure to have at least that tons to be had area where you save it.
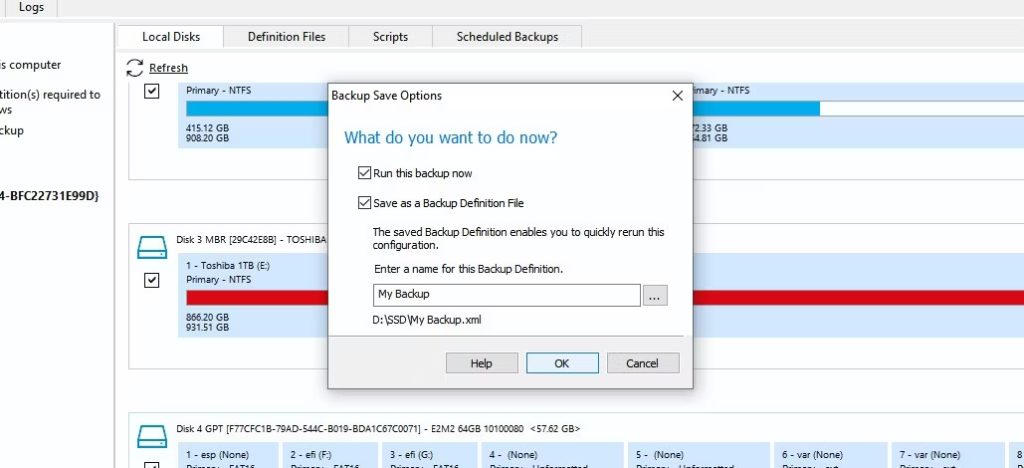
Name your backup image and click good enough till it starts growing the photograph report. It can take everywhere from a couple of minutes to approximately an hour relying on the scale of the force and how much is on it. My 64GB SSD most effective took about 5 mins.
Step 3: repair Your Backup picture in your New SSD
Now that your backup picture is prepared, you may now shut down your laptop, replace the vintage SSD with your new one, and boot your pc lower back up.
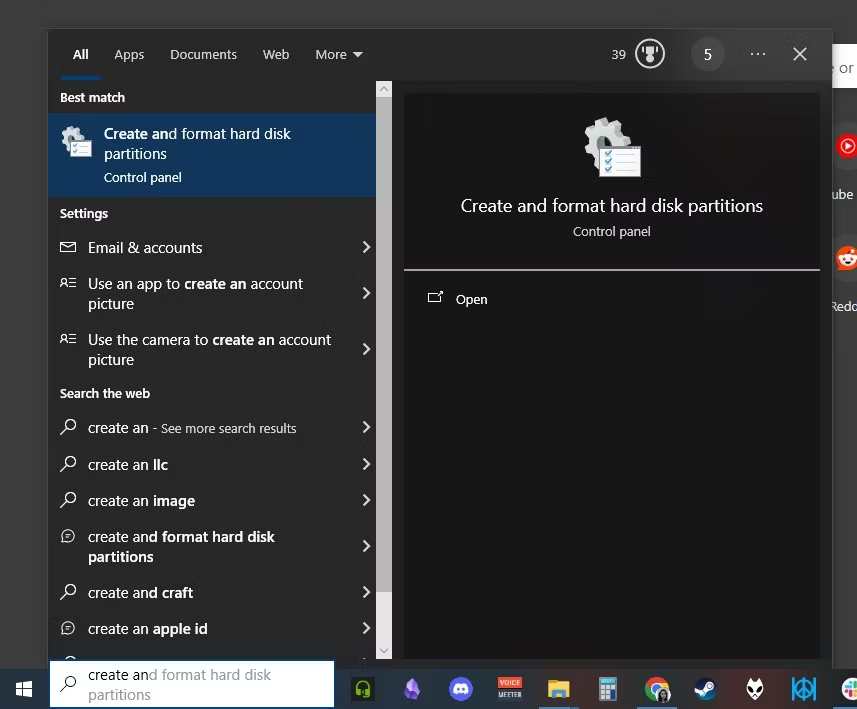
Before you open up Macrium mirror, look for “Create and format tough disk walls” inside the home windows seek bar. This will open up the disk supervisor.
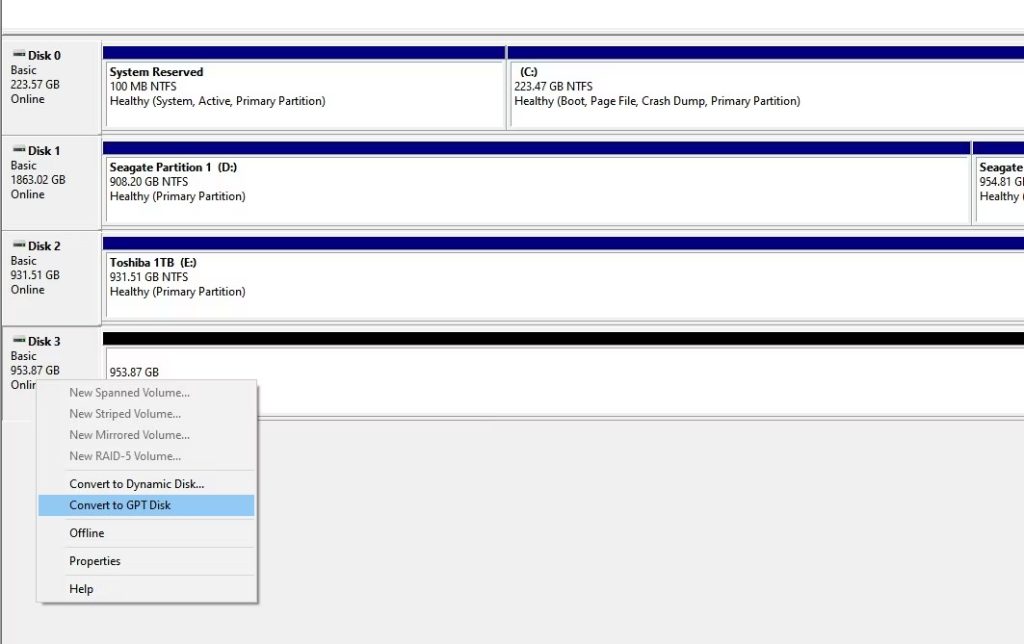
Search for your new SSD—it have to be black if it hasn’t been used earlier than. Proper-click on on it and select Convert to GPT Disk. The GPT partitioning scheme is what SteamOS works exceptional with, so it’s satisfactory to use that.
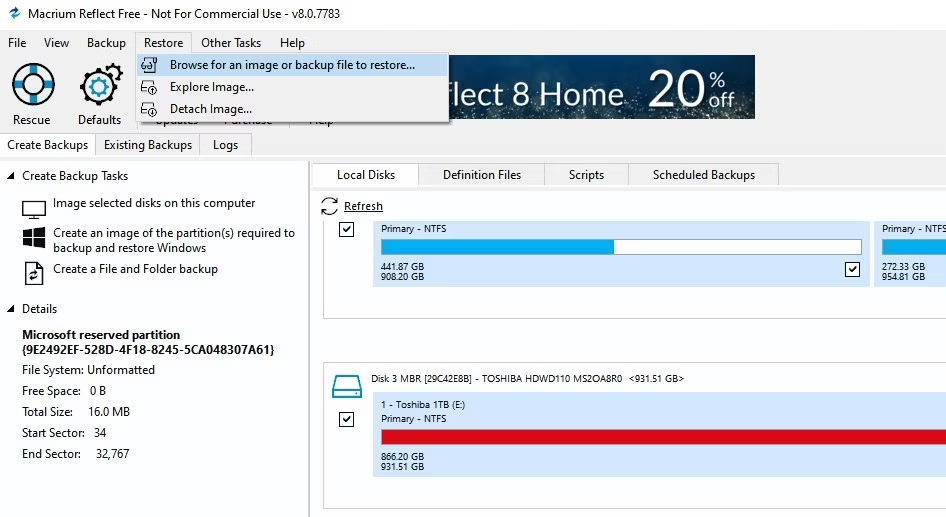
Open up Macrium reflect, and at the top menu bar, click restore > Browse for an picture or backup document to restore.
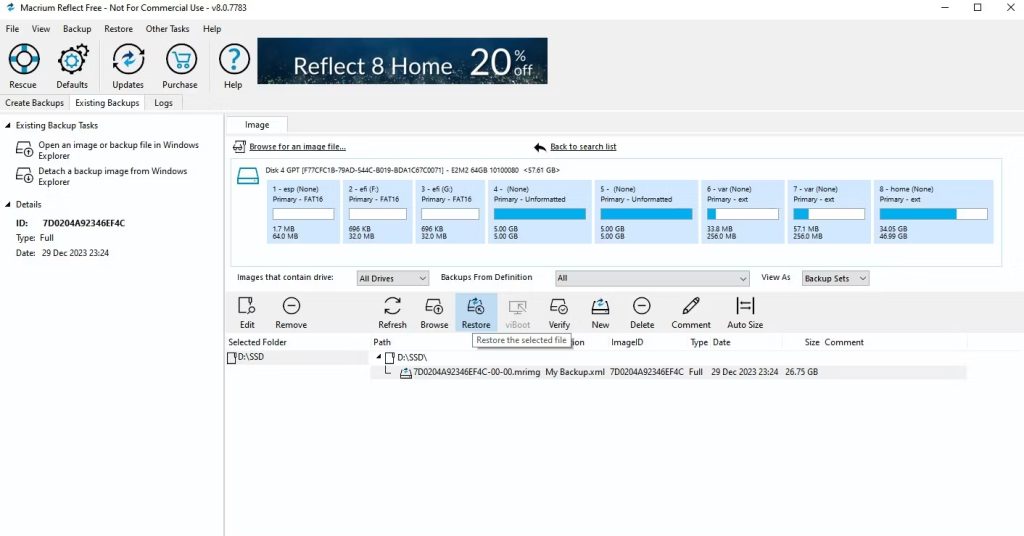
After you locate the photo report which you created earlier, select it in Macrium reflect and click restore.
A pop-up will appear, permitting you to pick in which you need to repair the photo to. Click on on select a disk to restore to…, and pick out your new SSD.
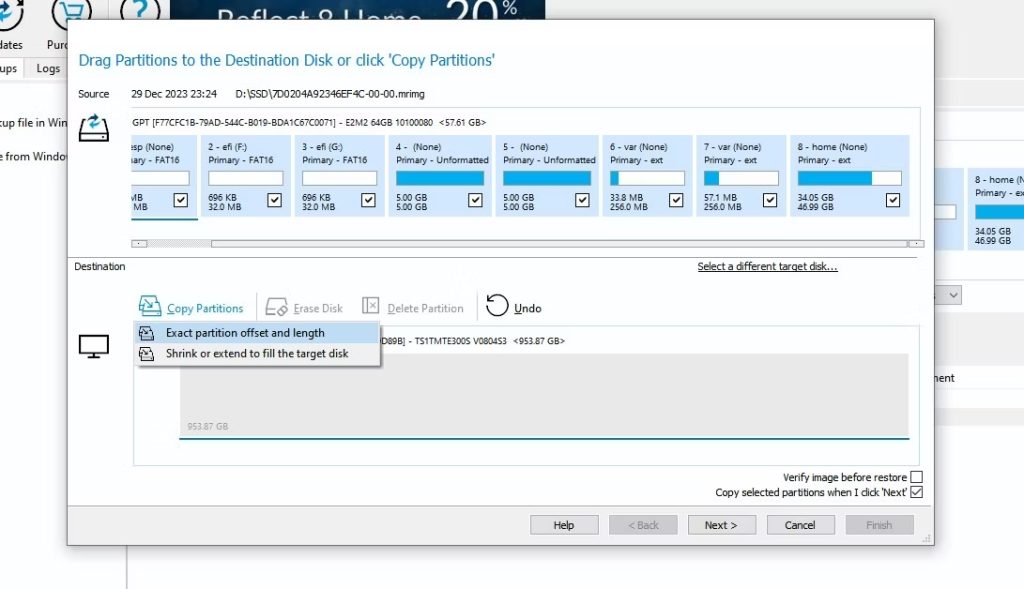
Click on on copy walls > specific Offset and period. This may visualize the partitions on the brand new SSD. Don’t worry about the empty space, depart that blank as SteamOS will at once put it to use after you boot up your Steam Deck.
Click on next until the end button is clickable. This will start pasting the picture onto the brand new SSD. It can take a while relying on how huge the entire operation is.
Step 4: Insert Your New SSD Into Your Steam Deck

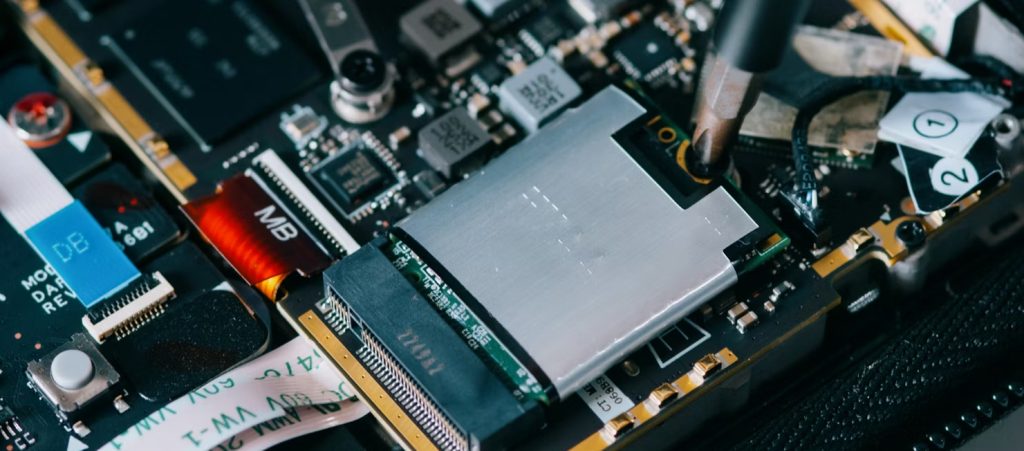
As soon as the old SSD’s image has been copied onto your new SSD, you may now shut down your laptop and installation the power onto your Steam Deck.
Electricity on your Steam Deck, and it should boot up with out you wanting to reinstall SteamOS or maybe log in in any respect.
If SteamOS in some way can not be observed, close down your Steam Deck and go to the BIOS.
You could open up the BIOS by using protecting down the volume up button and the strength button. You should let go of the power button whilst you pay attention a chime, but nonetheless maintain down the quantity up button till the BIOS seems.
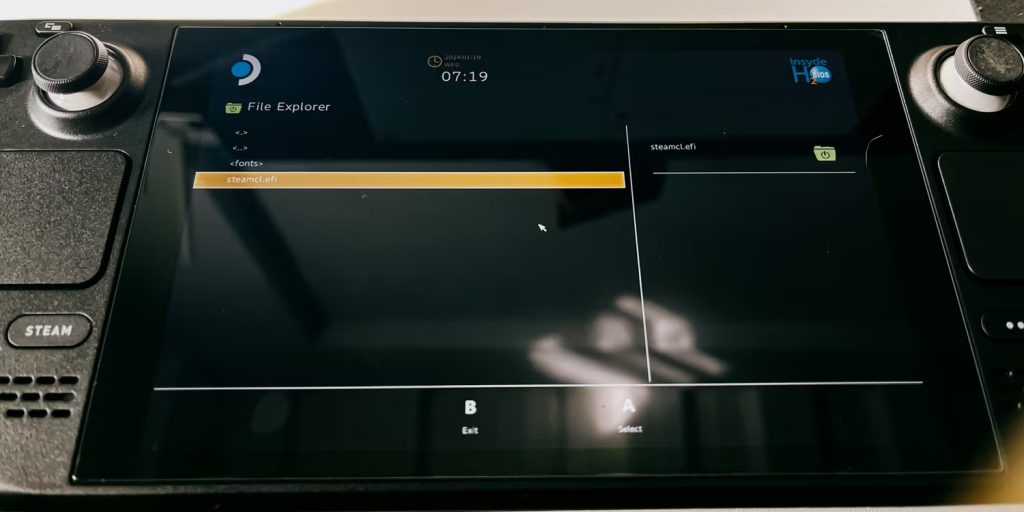
Pick out Boot from record > eps > efi > steamos > steamcl.Efi. You’re manually booting into SteamOS with this method and the subsequent time you switch to your Steam Deck, you shouldn’t want to do this again unless you have some other OS for your Steam Deck.
You can now move ahead and right now down load your games with out ever stressful about placing your Steam Deck up from scratch. We hope this manual has made it easier for you to improve your SSD.